


The backyard basketball court has quietly transformed from a simple concrete slab into a performance surface . The material you choose now has significant consequences for your joints, your game, and your long-term budget.
For decades, homeowners defaulted to asphalt and concrete when building outdoor courts. Both materials were durable, widely available, and relatively affordable. For a generation of players who simply wanted a hoop and a flat surface, that was enough. However, durability alone does not tell the whole story.
The introduction of modular sport tiles changed the conversation. As joint impact research gained mainstream attention, players and parents began asking harder questions about what years of playing on unforgiving hardscapes actually does to knees, ankles, and hips. Modular tiles — engineered with flex points and shock-absorbing geometry — emerged as a direct response to that concern. Today, outdoor basketball court surface options range from painted concrete to professional-grade interlocking polypropylene systems, each offering distinct performance trade-offs.
Environmental factors now drive material selection as much as cost does. UV exposure warps certain plastics. Freeze-thaw cycles crack rigid surfaces. Drainage requirements vary significantly by region. Even NBA court standards — which govern dimensions and equipment at the professional level — underscore how seriously surface quality shapes the game. The backyard court is no longer just about a flat slab; it involves choosing a system that performs under real conditions. And that starts with understanding what sits beneath your tiles.
Hardscape Foundations: Why Concrete and Asphalt Aren’t Enough
Concrete and asphalt have long defined backyard basketball court flooring — but treating them as finished playing surfaces rather than structural foundations is a mistake that costs players in comfort, safety, and long-term maintenance.
Concrete as a Sub-Base remains the gold standard for one clear reason: it provides a level, permanent, load-bearing platform that resists shifting and settling over time. Builders and contractors consistently recommend a properly cured concrete slab as the foundation of any serious court installation. But “structurally sound” and “athlete-ready” are very different thresholds.
Asphalt, while cheaper and faster to install, introduces its own complications. Summer heat softens asphalt’s surface, causing it to deform under repeated foot traffic and equipment. Over time, UV exposure and freeze-thaw cycles accelerate cracking, creating uneven surfaces that affect ball bounce and increase trip risk. ASTM F1882-04 outlines the stability and safety benchmarks that any residential basketball installation should meet — benchmarks raw asphalt often struggles to maintain consistently.
The body strain problem is where raw hardscapes truly fall short. Playing directly on concrete or asphalt offers zero shock absorption. Repeated lateral cuts, jumps, and landings transmit full impact force through ankles, knees, and hips — a pattern that contributes to chronic overuse injuries over a season or two of regular play.
Maintenance compounds the issue further. Painted hardscape markings fade quickly under weather and foot traffic, requiring periodic repainting that adds recurring cost and downtime. Covered surfaces, by contrast, tend to preserve court lines and color integrity far longer with minimal upkeep.
What makes these limitations matter is that they are not flaws in the hardscape itself — they are gaps that the right surface layer is designed to fill. This is precisely where modular tile systems become relevant.
The Case for Modular Sport Tiles in Backyard Settings
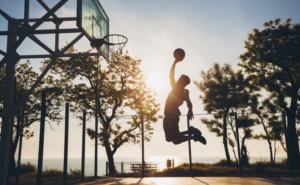
Modular sport tiles have shifted the backyard basketball court conversation because they solve problems that concrete and asphalt simply cannot — joint stress, standing water, and fading color among them.
Joint Protection and Lateral Forgiveness. The most immediate benefit players notice is underfoot. Polypropylene tiles flex slightly on impact, absorbing vertical shock and — crucially — allowing lateral give during cuts and pivots. That combination reduces cumulative stress on knees and ankles in a way that rigid hardscape never can. It is no surprise that, as one Reddit thread in r/Homebuilding notes, users increasingly ask which surface is least strenuous on the body, with tile systems emerging as the consistent answer.
Three technical advantages reinforce their appeal:
- Shock attenuation — the interlocking tile matrix distributes impact load across a wider surface area than solid concrete.
- UV-stabilized pigment — unlike acrylic paint, which chalks and fades within a few seasons, quality polypropylene tiles retain color vibrancy for years under direct sunlight, as detailed in outdoor court surface guides.
- Rapid DIY assembly — most modular kits snap together without adhesive or specialized tools, making a full installation achievable over a single weekend.
Pro Tip: Drainage is where tile design earns its keep. Open-grid tile patterns allow water to pass directly through the surface and drain away from the base layer. This eliminates the standing water and slick patches that plague painted concrete after rain — meaning your court is playable hours sooner, not days.
And once your surface is dialed in, the next logical question becomes how much space you actually need to make the most of it. Getting the basketball court dimensions right — and planning realistic over-run zones — is where smart backyard projects either succeed or stall.
Navigating Court Dimensions and Space Planning
Getting court dimensions right before you select a surface is one of the most overlooked steps in backyard basketball court planning — and it directly shapes every material and layout decision that follows.
A full regulation NBA court runs 94 feet by 50 feet, which is simply out of reach for most residential lots. A half court at 47 feet by 50 feet is far more realistic, but even that footprint demands a generous backyard. In practice, most homeowners are working with something smaller — and that constraint changes how you approach everything from hoop placement to surface selection.
Three-point line geometry adds another layer of complexity. The NBA three-point arc extends 23 feet, 9 inches from the basket at its deepest point. Fitting a full arc into a residential space often requires accepting a truncated or college-style line, or positioning the hoop closer to one edge. This is where surface choice starts intersecting with spatial planning in ways that are easy to underestimate.
Over-run and safety zones are the dimension that homeowners most consistently forget. FIBA guidelines establish specific runoff distances beyond the court boundary to protect players from collisions with fixed structures. A practical rule of thumb is to plan for at least 3 to 6 feet of clear buffer on every side, particularly behind the backboards. That buffer eats into your total footprint before a single tile goes down.
Court tile for outdoor basketball courts plays a direct role in how efficiently you can use the space you actually have. Modular tiles can be cut or configured to meet irregular property lines, and because they install directly over an existing slab, they do not require additional poured concrete to define the perimeter. That flexibility lets you maximize the true playable area within whatever boundary your yard sets. Choosing the wrong surface, on the other hand, can lock you into a fixed layout that wastes usable space at the edges.
Mapping these dimensions carefully upfront is crucial court versus half court, three-point arc depth, and safety buffer zones — sets the foundation for a surface investment that actually fits your space. And those decisions connect directly to the financial side of the project, which is where material choices start to have real, long-term cost implications.
Total Cost of Ownership: Installation vs. Longevity
Choosing the best surface for outdoor basketball court projects comes down to a single honest question: what does each option actually cost you over ten years, not just at installation?
Upfront costs tell only part of the story. A poured concrete slab typically runs between $4 and $8 per square foot installed, making a full half-court surface a $3,000–$6,000 project before any finish coating. Modular tile kits come in at a comparable range, but the comparison shifts dramatically once you account for what happens next.
Resurfacing costs are the hidden expense that concrete and asphalt owners rarely budget for upfront. Acrylic sport coatings — the painted finish applied over concrete — degrade under UV exposure and moisture, typically requiring reapplication every three to five years at a cost of $1,500–$3,000 per resurfacing cycle. Over a decade, that adds $3,000–$6,000 to your concrete court’s real price tag. Modular tiles carry no equivalent maintenance cycle.
Modularity changes the repair math entirely. When a concrete slab cracks or a section spalls, patching is labor-intensive and rarely invisible. A damaged modular tile snaps out and snaps back in — a repair that costs the price of a single tile rather than a contractor visit. ASTM sports and recreation standards define the durability benchmarks that professional installers rely on when projecting material lifespan, and modular polypropylene consistently meets those thresholds.
Climate durability is where the longevity gap widens further. Concrete is highly vulnerable to freeze-thaw cycles; water penetrates micro-cracks, expands on freezing, and progressively fractures the slab. In northern climates, this can shorten a concrete court’s functional life to 10–15 years. Modular tiles flex under temperature stress rather than crack, making them a more resilient choice across a wider range of climates. According to outdoor basketball court surface research, polypropylene tile systems are specifically engineered to handle thermal expansion without structural failure.
Cost Comparison Summary — 10-Year View: Concrete slab (install + two resurfacing cycles): $9,000–$18,000. Modular tile system (install + minimal tile replacement): $5,000–$9,000. The surface selection decision becomes clearer when longevity, climate resilience, and repair costs all sit on the same side of the ledger. The next step is understanding which surface properties matter most for your specific court setup.
What You Need to Know: Selecting Your Surface
Concrete is the best base, and modular tiles are the best finish — understanding that distinction makes every other surface decision easier.
The sub-base question comes first, and it rarely gets enough attention. A solid concrete foundation remains the gold standard for any backyard court because it provides the dimensional stability that modular tiles need to perform correctly. But concrete alone is a punishing surface for repetitive athletic use. What typically happens in practice is that players on raw concrete absorb significantly more joint stress over time, which erodes long-term playability and discourages consistent use. The right approach treats concrete as infrastructure, not as the finished product.
Shock absorption deserves serious weight if your court will see high-frequency use — daily shootarounds, pickup games, or youth training sessions. Modular sport tiles are specifically engineered for high-performance and safety in outdoor athletic environments, which is why they consistently outperform poured surfaces on this metric. The suspended tile design flexes slightly on impact, reducing strain on knees and ankles in ways that neither concrete nor asphalt can replicate.
Drainage and slope are non-negotiable details. Before any tile goes down, confirm your sub-base holds a 1% slope — roughly one inch of drop per eight feet of run. That gradient channels water off the court rather than pooling beneath the tiles, which prevents both surface degradation and slipping hazards.
DIY potential is one of modular tiles’ most practical advantages, particularly when basketball court size is a factor. A half-court or three-quarter layout is well within reach for a motivated homeowner on a level, properly prepared base. Tiles interlock without adhesive, which also means reconfiguring or expanding later stays straightforward. Choosing the right surface ultimately sets the stage for every other decision — and the next step is matching that choice to your specific site conditions and budget with the right expertise behind you.
Making the Right Call for Your Court
The best outdoor basketball court surface is not the one with the lowest price tag — it is the one matched precisely to your site conditions, your performance expectations, and your long-term budget.
Every section of this article has reinforced a performance-first mindset: ball response, traction, drainage, joint health, and total cost of ownership all matter more than surface aesthetics alone. That thinking should carry directly into how you approach your own project. Start with the ground beneath your feet, assess your climate, define how seriously the court will be used, and then work backward to the surface that earns its place.
Professional consultation is not an optional step. Site preparation — grading, drainage, base material selection — determines whether any surface performs well for a season or for a decade. Skipping that conversation tends to produce costly corrections down the road. A qualified installer will assess your specific yard conditions in ways that no online guide can replicate.
That is exactly where Sportsurfaces becomes a genuine asset. They offer expert guidance on selecting and installing the optimal outdoor court surface, helping you move from research to a concrete plan without second-guessing your options.